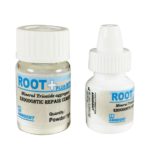


Ammdent Root Plus MTA

Original price was: $50.38.$40.50Current price is: $40.50.
Good Compressive Strength. Ions Calcium Release: Enhances the formation of mineralized tissues; provides the biological seal of perforations and total repair of damaged peri-radicular tissues. Hydrophilic: Can be used in humid areas without losing properties. High alkalinity: Antibacterial properties. Low solubility: Does not allow leakage. Calcium oxide: Promotes tissue Biocompatibility. Aggregated oxides: Great compressive strength. High radiopacity: Higher radiopacity than that of dentin, allowing excellent radiographic visualization.
Features
Description
ROOT PLUSMTApowder is consisting of very fine hydrophilic particles of several mineral oxides.
After contact with ROOT? liquid, it forms a gel hardens to an impermeable barrier.
COMPOSITION :
- The powder is consisting of very fine hydrophilic particles of several mineral oxides
- After contact with ROOT? liquid, it forms a gel hardens to an impermeable barrier.
INDICATION :
- Repair of root perforations during root canal therapy.
- Root end filling(retrograde).
- Root capping.
- Root end filling(orthograde).
ADVANTAGES:
- Anti-microbial activity.
- Non-Toxic & Non-mutagenic.
- Vasoconstrictive. Beneficial for hemostasis most important in pulp-capping.
- Excellent long-lasting sealability.
- Decreases solubility.
- Ability to set even in moisture orblood.
- No Dimensional Changes in the setting.
- Minimum micro linkage through long setting time prevents setting time, prevents setting shrinkage.
- High success rate.
- Alkaline Ph, Which may impart an antibacterial effect on some facultative bacteria.
- It can induce the formation of dentin, cementum, bone and periodontal ligament.
- Excellent biocompatibility and appropriate mechanical properties.
- Produces and artificial barrier, against which an obturating material can be condensed.
- More radio-opaque than Ca(OH).
- Store ROOTPLUS at a dry place at 10-25?C)(50?F-77?F).
- Do not store below 10?C(50?C)).
- Do not use after the expiry date.
- 1 x 1gm Powder
- 1 x 3ml Liquid
- The powder/liquid ratio is 26/1.0.
- This can be obtained by mixing 1 level scoop of powder and 2 drops of liquid.
- If a thinner or firmer (orthograde) (see 5.4)the room recommended mixing ratio is 2.1 (by weight).
- This can be obtained by mixing 3 level scoops of powder and 8 drops of liquid.
- The mixed material gives a sufficient amount for apexification that can be applied optimally with a suitable application device into the root canal.
- For mixing of ROOT? use a mixing pad that is impervious to water or a glass block of suitable dimension.
- For accurate dispensing of ROOT? powder shake the bottle to loosen the powder.
- Overfill the spoon with the powder, level the powder with the mixing spatula and carry it into the mixing pad.
- For dispensing of ROOT? liquid turn the bottle vertically with the tip about 5cm above the mixing pad.
- Steady your hand and squeeze the bottle gently to dispense one drop at a time.
- If any bubbles are present, lightly tap the bottle with the fingers holding it.
- Discount undersized drops that contain bubbles and are obviously not full-sized.
- Discount over-sized drops usually resulting from holding the bottle to close to mixing pad or squeezing the bottle too hard and/or for too long.
- Use a small spatula to rapidly mix all the cement powder in portions into the liquid.
- The mixed cement should be thixotropic and have a homogeneous consistency. The total mixing time is 30 seconds.
- If desired, a more rigid consistency can be achieved by adding some liquid.
- After use, tightly close both liquid powder bottles to prevent exposure to moisture.
- Place rubber dam and clean the root canal system using intra-canal instruments and irrigate with NaOCI.
- Dry the root canal with paper points and isolate the perforation.
- Fill the apical canal space p to the perforation completely with a suitable root canal filling material.
- Mix ROOT? as described under point 4.
- Apply ROOT? with suitable instruments into the perforation site and condense it.
- Check the position of ROOT? in the root canal by an X-ray.
- If an adequate barrier has not been created, rinse ROOT? out of the canal and repeat the procedure.
- Remove excess moisture with a damp cotton pellet or a paper point.
- Place a damp cotton pellet in the access to the root canal and apply a temporary filling material.
- Alternatively, seal the access preparation with a suitable root canal filling material and seal the cavity with a tight filling.
- Both options can be done not before 5 minutes after the placement of the ROOT?.
- ROOT? repair material remains as a permanent part of the root canal filling.
- Create access to the not-end and resect the root with a surgical bur.
Use an ultrasonic tip to prepare a class I root-end cavity preparation to a depth of 3-5mm.
Isolate the area and dry the root end cavity with paper points. Achieve hemostasis with suitable methods.
Apply ROOT? with suitable instruments and condense it using a small plugger.
Remove excess cement and clean the surface of the root with a moist piece of gauze.
Confirm placement of the MTA-universal repair material with an X-ray.
The ROOT? repair material remains as a permanent part of the root canal filling.
Place rubber dam and prepare the cavity outline. If caries is present, remove it. Rinse cavity and exposed pulpal areas with a suitable disinfectant.
- With a suitable instrument apply a small amount of ROOT? place a small amount of a flowable light cure linerand light cure.
- Etch the remaining cavity walls according to the total-etch technique with ETCHING GEL and apply a suitable bonding agent according to the corresponding instructions.
- Place a light cure composite according to the instructions and light cure.
- Pulp vitality and status should be checked by X-ray at regular intervals.
- Place rubber dam and clean the root canal system using intra-canal instruments and irrigate with NaOCI.Dry the root canal with paper points.
- For disinfection place calcium hydroxide paste in the root canal for one week.Seal the access opening with a temporary filling material.
- with a suitable instrument apply a small amount of ROOT? into the apical region and condense it. Create a 3-5mm barrier of ROOT?.
- Check the position of ROOT? by an X-ray. If an adequate barrier has not been created, rinse ROOT? out of the canal and repeat the procedure.
- Remove excess moisture with a damp cotton pellet or a paper point.
- Place a damp cotton pellet in the access to the root canal and apply a temporary filling material.
- Alternatively, seal the access preparation with a suitable root canal filling material and seal the cavity with a tight filling.
- Both options can be done not before 5 minutes after the placement of the ROOT?.
- ROOT? repair material remains as a permanent part of the root canal filling.
Key Specifications
Packaging
Direction of use
DISPENSING AND MIXING.
STEP – 1
STEP -2
STEP – 3
STEP – 4
STEP – 5
STEP – 6
STEP – 7
STEP – 8
STEP – 9
STEP – 10
STEP – 11
STEP – 12
STEP-13
STEP – 14
STEP – 15
STEP – 16
STEP – 17
REPAIROFROOTPERFORATIONS :
STEP – 1
STEP – 2
STEP – 3
STEP- 4
STEP – 5
STEP- 6
STEP – 7
STEP-8
STEP – 9
STEP – 10
STEP -11
STEP – 12
ROOTENDFILLING(Retrograde)
PULP CAPPING :
ROOTENDFILLING(orthograde)
Related Products


DOSH SIRIM Approved Aura Particulate Respirator for ease of breathing and help reduce exposures to certain airborne particulates


Key Features
4 Different Abrasive Grades & 2 Thicknesses.
Flexible Polishing Discs with Aluminium Oxide Coating.
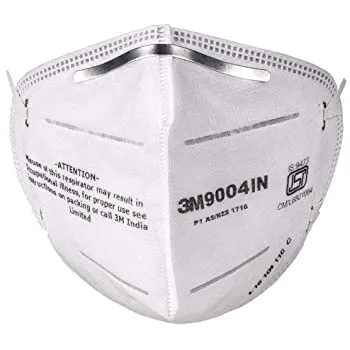


Standard size/headband N95 disposable respirator

Key Features
Convenient & Easy to Apply.
Fits Comfortably Behind Glasses & Permits Free Movement Of Eyelid.
Hypoallergenic Adhesive is Gentle to Child’s Skin & Reduces Risk of Skin Irritation.

Key Features
Stapled Headband.
Exhalation Value (Yes).
FDA Cleared (No).


Provides effective protection from dust and mists


Key Features
Easy & Hygienic Handling: Clicker Dispenser.
Low Film Thickness: For Perfect Indirect Restorations.
Strong Adhesion, Enhanced Marginal Integrity.


NIOSH, a federal government regulatory agency, has tested and approved the 6000 Series with 3M cartridges, filters or supplied air systems to help reduce breathing certain airborne contaminants. 3M 2091 P100 Particulate Filter with Organic Vapor has exceptional 99.97 % filter efficiency and meets NIOSH P100-series test criteria Versatile protection against many oil and non-oil-based particulate contaminants. When properly fitted, this respirator helps provide protection in a variety of applications including welding, brazing, torch cutting, metal pouring, soldering, and exposure to lead asbestos, cadmium, and arsenic, at concentrations up to 10 times the Permissible Exposure Limit (PEL). This respirator is remarkably comfortable, soft, and lightweight, and features easy-to-adjust head straps. Easy-to-adjust head straps allow for a customized fit to the user. The swept-back design of the cartridges helps improve balance and visibility. Breathing hazardous particles, gases and vapors can be harmful to your health. , The 3M 6200 respirator mask helps reduce exposure to many contaminants. Enhanced comfort and visibility features make wearing the respirator noticeably more enjoyable. Reusable design. Get the job done without frequent change-outs.
- Medical Supplies
- Anatomical Models
- Body Weight Machine
- Braces, Splints & Supports
- Dental Products
- Basic Dental Products
- Clinical Problem Solvers
- Corona Safety
- Dental Consumables
- Dental Equipment
- Dental Models
- Endodontics
- Equipments
- General Dentistry
- Implantology
- Instruments
- Kits
- Laboratory
- Offers
- Oral Surgery
- Orthodontics
- Paedodontics
- Patient Education
- Periodontics
- Prosthodontics
- Rative Next
- Restoratives
- Sterilization
- Student Section
- Diagnostic Instruments
- Gynecology & Infant Care
- Health & Nutrition
- Lab Supplies
- Medical Accessories
- Medical Clothing
- Medical Equipment
- Medical Simulators
- Mobility Aids
- Respiratory Care Products
- Surgical Instruments